We couldn't get the simulator UL approved until we found a way to keep the motion cables under the sim from being walked on. We decided to install an unused maintenance platform from another simulator over the cables, then we could use just a small amount of raceway to protect the portions of the cables not under the work platform. Since this sim is 2 feet higher than any of our other sims the platform will be handy to reach the maintenance doors on the bottom of the motion base.
Day 36 - October 7th
This morning we continued testing of the OTM and then in the afternoon CAE tuned the motion buffet functions. We thought it was a little to high in certain conditions and a little too low in others. Since the buffeting effect is mostly subjective, CAE made adjustments while our guys sat in the cockpit to feel and evaluate the buffeting effect.
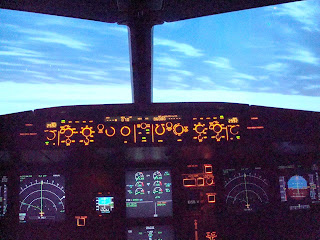
Flying above the cloud tops
Day 35 - October 6th
Testing by US Airways started today. We began with a subjective flyout that is done by one of our pilots who is very familiar with the A320 - in this case it was Al Hancock. The flyout is a sort of "look-see" where we just go through a normal flight and see if we notice anything that might be incorrect or need to be changed. We also use this time to check some particular things that are important to training or peculiar to US Airways.
After lunch one of our Lead Engineers, John Sutherland, continued with Al to start the Operational Test Manual (OTM). The OTM is a set of operational scenarios designed to test how well the aircraft systems are simulated from the viewpoint of the pilots. In the CAE-developed OTM there are 11 different scenarios created to check all phases of flight and hopefully, most of the common procedures needed by the crews, including some malfunctions.
Day 33 - October 4th
CAE finally received the special sound-dampening carpet pad and today they installed the carpet on the flight deck. They'll have to rerun the QTG for the sound system and tune it for the new acoustics now that there's quite a bit less echo on the flight deck.
Something else that is new is that there is a dimmer on the lights for the back of the flight deck area where the instructor sits. I think this will be a nice feature. Also, the lights are mounted in the ceiling behind some louvers that seem to direct the light downward and should help reduce reflections and glare in visual and off the instruments.
Day 32 - October 3rd
CAE continued working on integration and ironing out some issues here and there. Also, I believe their test pilot continued some of the Manual QTG and subjective testing.
Day 31 - October 2nd
After about a week and a half of 12-hour days working on it, I finally got through the first pass of the Qualification Test Guide (QTG). I had reservations on about 20% of the tests, so now comes the arduous task of reviewing CAE's corrections and/or explanations and re-reviewing those tests. I think I'm starting to go blind! LOL!
Day 30 - October 1st
CAE is providing an auto-alignment tool for the visual system that will help reduce the labor required to maintain the visual picture quality. It involves a camera that the software uses to view the visual display and the test patterns, a light meter that senses the gamma (so brightness and color temperature can be automatically adjusted) and the software itself.
This system has been in development at CAE for a while and I believe we will be the first to have it. We're hoping everything goes well and the tool works as it purported to.
In the pic below you can seen Henry Ng working on the camera. He's epoxying the lens for the light sensor onto the bottom of the camera. The lens directs light into a fiber-optic cable, which transports it to a box that breaks it down and communicates the information to the computer for analysis. This entire assembly hangs inside the top of the visual dome behind the back-projection screen.
Day 29 - September 30th
I went through the remaining visual hardware ATM (Acceptance Test Manual) with Henry this morning. I was able to get some hands-on time with the alignment software tool that is used for setting up the visual geometry. I must say it's far easier to use than what I'm used to. It was very intuitive and took me a very short time to become comfortable with it. I would guess that between Henry and I we managed to get a good manual alignment done in about 45 minutes, including my learning curve. Hopefully when the auto-alignment tool is ready it'll cut that time down even further.
Subscribe to:
Posts (Atom)